Sunday 28 August 2011

Club Night 26th August

As a total change, for the first time in a long while I participated in a big game with no less than 10 members involved. We used to play games like this quite a lot, but with the space we have and varied interests it hasn't happened as often so was a refreshing change. We played a Fire and Fury scenario organised by Steve H. It was a particular battle, but I forget which, although this shouldn't reflect on the organisation which was second to none.

Ian took the Union left flank against Rick, with Mark supporting to Ian's right. On our right was Andy against Colin, while Bob and I attacked up the middle with Scott supporting us, against Chris Jones, with Steve K bring up the reserves for the Rebs.

Attacking into a mass of guns and infantry in defences was always going to be a tough proposition, but we made it to the enemy lines faster than I had expected with lighter casualties. Except on the right flank, where Andy had rolled to see what the enemy cavalry was doing and it turned out General Forrest had swept around our flank and arrived behind our lines forcing a defensive action and a massive and rapid redeployment of our cavalry to counter this (historically this could have happened but didn't hence the dice roll).

We attacked the enemy trenches and were initially forced back, but with Scott's support arriving I managed to push into the trench and out the other side, only to be repulsed by Rebel reserves and pushed out again. Next time I attacked with Scott and Bob at the same time and we pushed in to the Rebel centre at various points, but again were met by a viscous counter attack that drove most of us out. A third attack made it in to the trenches again, but any further counter attack would be devastating as my brigades were all close to spent and the brigades of Bob and Scott's division were not in much better shape.

So a victory for the Rebs, but the Yankees had pushed it closer than anyone expected and a really fun game to play, both for scenario and rules, and the camaraderie.

Above: Hidden behind a rule book the Confederate flank attack arrives, Below: the Union rightAbove: The main Union attack in the centre, Below: The Rebel line is breached for the first time

Tuesday 23 August 2011

Club Night 19th August

Luke and I decided to channel our excitement over the release of Hellfire and Back and actually play some test games. We played around with various lists that we could build using proxies from our mid war to count as for early war, although we were surprised how much we could do without needing any new purchases.

Our first game matched a Comaigna Carri from the Italians against a British Jock Column in the new dust up scenario. With the high quality of the British, especially the RHA, I had a numerical advantage, but would have to cope with Italians with considerably less training and experience than I am used to, although their individual bravery is as good as ever. Setting up in opposite corners with an objective behind us I started with mostly armour and some supporting artillery, while the British deployed recce vehicles and 2 and 25 pounders of the RHA.

The massed RHA guns hammered my armour as I struggled with the handicap of the slow tanks before they had their engines upgraded and so an unusual lack of mobility. The recon swept around my right, joined my the British reserves and drove towards my artillery holding my objective, leaving just my CO among the burned out wrecks of the Italian armour.

However, hidden as he was by smoke and dust they ignored him and he was able to inflict heavy damage on the light British vehicles and my gunners (traditionally always the elite of the Italian armed forces) held off the rest, while my motorcycle troops arrived from reserve and swept onto the enemy objective, holding it despite heavy fire from the RHA as the British suddenly realised the nature of the threat and tried to react, but it was too late the Italians claimed a narrow and hard fought victory.

Above: Brits Flank attack, Below: Italians seize victory

After this game we decided we had time for another game, this time a Bersaglieri company against a British Armoured Regiment. However we ended up playing the new witches cauldron variant on the cauldron mission, and with no infantry and artillery support the British would have a very tough time defeating the dug in infantry with primary machine guns. And this was exactly what happened, the Italians lost some force to the weight of fire, and the coastal artillery when it tried to redeploy when the British attacked only on one flank, but in return dug-in 47 and 75mm guns made short work of the enemy armour, with the extra luck of hitting and stopping the CS tanks early on too. A decisive Italian victory.

Also on was a Great Northern war game. This has been a pet project of Andy and Colin's for some time and to see it all set out on the boards from Tannenburg it looked amazing so I took a couple of pictures.

Saturday 13 August 2011

Hellfire and Back - First Impressions

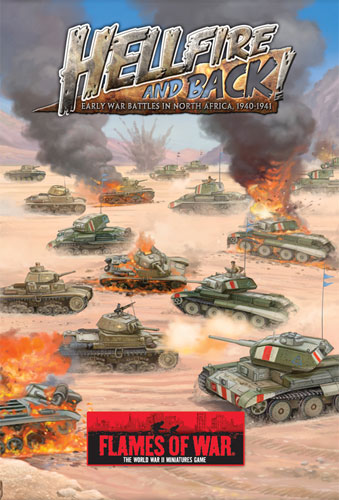
My copy of Hellfire and Back, the new early desert war supplement by Battlefront, arrived from Wayland Games this morning and I have barely put it down since. It has been just what has been needed to revitalise my Flames of War gaming as we come to end of our Crusader campaign.

At first glance I am really not keen on the cover artwork, something about the perspective seems out and it lacks a strong focal point. Inside however it is a different story, the usual mix of artwork, mini photos and period photos illustrate it throughout. If you have nothing else to say about battlefront you can not fault their presentation and the quality of their printed products.

I haven't really looked at the German lists so I will just focus on the British and Italian lists and all the extra stuff. First up, the Italians. As usual they are slightly the poor cousin with only 4 lists, but they are all really good. Organisation is different for the infantry as expected for pre AS42 lists, but seem accurate and balanced. Points have varied which is as expected as quality for troops in 8 million bayonets has also changed, much less veterans so this will change the way they play a bit. The other odd thing to have changed is the stats for some vehicles and guns. I'm not sure about the rational about this, but it is going to be confusing when you also use the same vehicles in mid-war with different values.

The British have many lists, split between British and Commonwealth forces and include the terrifying looking Armoured regiment, just by the sheer number of vehicle they will have with a gun quite capable of knocking out their Italian equivalents, even if their armour is considerably left. The rest of the forces cover the other armoured forces, 'jock' columns and infantry forces. The reconnaissance forces look interesting with their ability to move an opponents objective after deployment. This could make them a really viable force to play with.

The new rules primarily cover the fortification force that are available (1 for each nation) and how these work. The basic rules are basically the same as the rule book but they deploy differently. making little self-contained positions separated from each other, with reserves to arrive to support them. It will be interesting to see how these play, especially as with the Italians I can have a CCNN forces. The other rules are the motorcycle reconnaissance rules which I understand are the same as in blitzkrieg, and should change the way my motorcilisti troops play (although I will need quite a few more bases to make a force).

The final part of the book (aside from the historical background which I haven't read yet) is the terrain rules. These provide variable terrain types that you don't roll up unit you get close enough (I.e. in contact) to see what is actually there. The only thing that I feel is missing is rules for deploying the templates on the table, like in the main rulebook. I think we will be modifying the desert terrain chart there to incorporate these new terrain types.

Overall it seems to be a really good book. I would have liked to see a fuller set of terrain rules, and more Italian lists, but seems really good, and opens out a period of the war Luke and I really like and we are already talking about what we are going to add to our existing forces so we can do some Operation battleaxe battles. I would give the book a 4/5, pretty good, but not quite perfect! A battle report should be coming next weekend.

Wednesday 10 August 2011

Club Night 5th August

My Blood Angels got their first run out in the club 40k league. I had managed to flat coat them, but unfortunately I got a slight whitening on some of the models so I need to revisit them and see if I can rescue them. Any ideas?

My first game was against Ian's Dark Angels. It was going to be interesting as both being marines we would be fairly similar and I had no idea what I would be facing. It turned out there were two elements to his force, 3 units of Deathwing lead by Belial, and 3 tactical squads led by a chaplain with his command squad, supported by scouts and a vindicator.

I finally decided to deploy some of my army on the table as we played a capture and control mission with spearhead deployment. I started with two assault squads, both with a sanguinary priest and supported by a land speeder on table, with the plan to launch them in opposite directions using the terrain to cover them before they could assault, avoiding the giant shell from the vindicator.

My squads bonded forward, coming under some desultory fire from the scouts and one of the tactical squads, but mostly staying out of sight. My deep striking reserves then arrived with the help of descent of angels. The veterans arrived immediately behind the enemy objective, declaring a heroic intervention to charge the terminators defending it, while the two death company units spread out to support them.

Here is where I took my first serious set-back. Both the chaplain with his combi-melta and the land speeder with the multi-melta missed the vindicator, leaving it free to fire accurately at Astorath and his Death company killing all but the Blood Angel hero and one of his crazed companions, while the chaplain and his squad came under fire from Belial and his escorts and a tactical squad and were also reduced to the chaplain and 1 death company.

Fortunately it wasn't all going against me. I had run one assault squad away from the enemy chaplain when I realised they were too far away to assault, and the other squad was working its way through a terminator squad, despite the re-enforcement of a tactical squad. And the veterans were having more success. Another tactical squad had hurried in to support the terminators that had been their initial target, but having lost the combat, the tactical squad fled from the combat with such speed they left the table.

The land speeder then moved around the rear of the vindicator and destroyed it, while the final assault squad had dropped in ready to support the other assault squads while the chaplain and his companion proved no match for Belial and his terminators, but Astorath and his survivor demonstrated how terrifying a full squad would have been by destroying the scouts in a single combat.

Almost all my unit were now in combat, with one assault squad reducing the command squad to just the Interrogator chaplain, and the other two combining to destroy the terminators and all but one tactical marine who stubbornly held on, while I moved the other units around to avoid Belial until I could launch a co-ordinated attack, but luckily my heavy flamer managed to kill two of them.

I finished off the survivors and moved my assault squads and surviving veterans into a position to attack Belial and his Deathwing, while one assault squad hurried back to claim my own objective. I then launched my final assault and took down Belial by sheer number and some poor armour saves.

I had managed to claim a total victory by wiping out the enemy, but I had learnt a lot. The death company can still get killed by massed small arms fire, and their pistol fire is better to sacrifice in place of a run when they deep strike to spread out so they are not as vulnerable to template weapons. Ian's army was good, but he needed to be more aggressive, probably by deep striking his terminators, and maybe in the longer term getting some Rhinos for his other marines. But at least I managed to start this league with a victory, lets see if I can maintain my momentum.